
Lighthaus : An Ultimate Beginners Guide – DIY Soy Candles
Soy candles are becoming a part of everyone’s lifestyle – whether it’s about decorating home, creating a better atmosphere or aromatherapy people are using them in the best way they can. But some people still resist buying soy candles one of the reasons being they find it pretty expensive as compared to the other type of candles available in the market. Don’t let the price tags stop you from enjoying the benefits of soy candles when you can create them yourself at the ease of your home. Here’s your step by step guide for making amazing soy candles:
Things You Need
- Soy Wax Flakes
- Fragrance Oils
- Candle Dye Chips
- Mason Jars, Tins or any other container
- Candle Wicks and stabilizers
- Wick Holder or Pencils
- Thermometer
Step 1

The first step is to connect the candle wicks to the stabilizer, you can either use a hot glue gun or some melted wax. Place the wick and stabilizer to the bottom of jar or container, pour some melted wax or hot glue, let it cool down so that the wick and stabilizer remain at their place even while pouring melted wax.
Step 2

Now you need to melt wax very carefully, soy wax can catch fire if you don’t melt it the right way. Use a double boiler, just place the saucepan on the stove and fill it with water. Place a heatproof or metal bowl/container inside the saucepan, make sure that the metal container is floating on water and is not submerged in it. Turn on the stove on medium flame, start dropping soy candle flaked in the bowl, keep stirring with a spoon or whisk.
Step 3

Once the wax is melted, you can start adding dye chips. But before adding dye chips make sure that the temperature of the wax is between 170-180 Fahrenheit. You can check it with your thermometer, once you have attained the right temperature start adding dye chips. You can smash color chips with spoon or spatula so that it gets mixed quickly.
Step 4

You will be adding fragrance to melted soy wax in this step, let the wax cool down at a temperature between 150-160 Fahrenheit. Use a thermometer for checking the exact temperature and add fragrance oil, the fragrance oil should be 10% of the melted wax. You can choose any fragrance or mix two to create your own unique fragrance, keep stirring the melted wax so that the oil is thoroughly blended.
Step 5

Start preparing your jars, wrap the wick around a wick holder or pencil so that it stays centered when you pour wax. Once the wick is stable, start pouring melted wax, this is the most crucial step and you need to pay extra attention to it.
Step 6

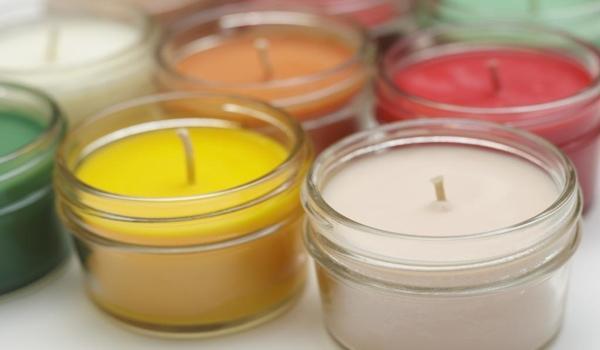
You can pour the wax in as many containers as you want, once the wax is cool and solidified, trim the wicks. You can decorate the jars with ribbons and other accessories, light them up to refresh your mood or gift them to your dear ones.